Using Google products? Checkout our QR code attendee plugins for Google Sheets™ and Google Forms™, and our QR code loyalty card for vouchers add-on.
For Whatsapp & Telegram, check-out our QR code ticket bot.
You just created your first Trak QR code automation application; congratulations! Now what next?
The way we track changes to real world items is by scanning the QR code on them, using the appropriate step button.
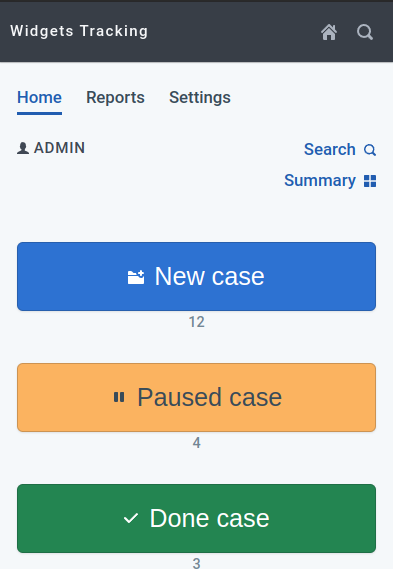
What are step buttons? Those are the big ones you see right away on your app home page! Each one opens the scanner, and shows an optional form, if that step needs additional data.
Every item represented in Trak should have their own QR code.
Where do you find the QR codes? You can print they any time inside the app, using a regular office printer for A4 paper! They are all different, and never expire, so free feel to print a big batch.
Not ready to print? Open this page on another device to display QR codes.
On first use, put a new QR code on the new item to track (case, tool, asset, parcel, etc.), then register it with the first, blue button. It is usually named “Registration”, “New case”, etc.

When a bunch of tracked items reach a given step, simply press the corresponding button, and scan them in batch.
At any moment, you can check the “Report” tab for stats about items you are currently tracking.
Need to add new item groups or new colleagues? Head to the “Settings” tab. Inviting new colleagues is as simple as sending them an invite link.
Your access credentials are automatically saved on your device, so no login is needed. To use the app on another device, check the “User Account” section in the “Settings” tab.
Should you need any customization not currently visible in the app (there are a lot of those!), like GPS, signature, alerts, custom reports, custom paper sizes, QR codes with embedded form data, etc., please reach out.
Check our demo videos on the Trak QR Youtube channel and read about some QR code tracking use cases for further information.
Happy scanning!
