
Last updated: July 28, 2026
QR Code Status Tracker turns a Google Sheets™ spreadsheet into a simple item-status workflow. Each row represents a physical item. Staff scan or enter its code, move it through your chosen steps, and review its history. If you enable customer updates, each item also gets a link-only status page at a long, unguessable URL that is not listed publicly.
A repair shop is one example. The same approach works for equipment handoffs, samples, orders, staging, installations, service jobs, production steps, or any workflow where staff or customers need to know where an item is now.
Install QR Code Status Tracker from Google Workspace Marketplace.
Before you start
- Put column titles in row 1 of the sheet you want to track.
- Keep one item on each following row.
- Decide whether staff will use codes already attached to items or QR labels created by the add-on.
- Choose a short ordered list of statuses, such as Received, In Progress, and Ready for Pickup.
- Decide whether customers should be able to view progress from a link-only status page.
Set up the tracker
- Open the Google Sheets™ spreadsheet containing your item rows.
- Open Extensions, choose QR Code Status Tracker, then open the add-on.
- Choose the sheet that contains the items.
- Choose Use codes already on the items or Create QR labels for items.
- If customers should see progress, turn on Let customers see progress.
- Review or edit the ordered status steps.
- Save the setup.
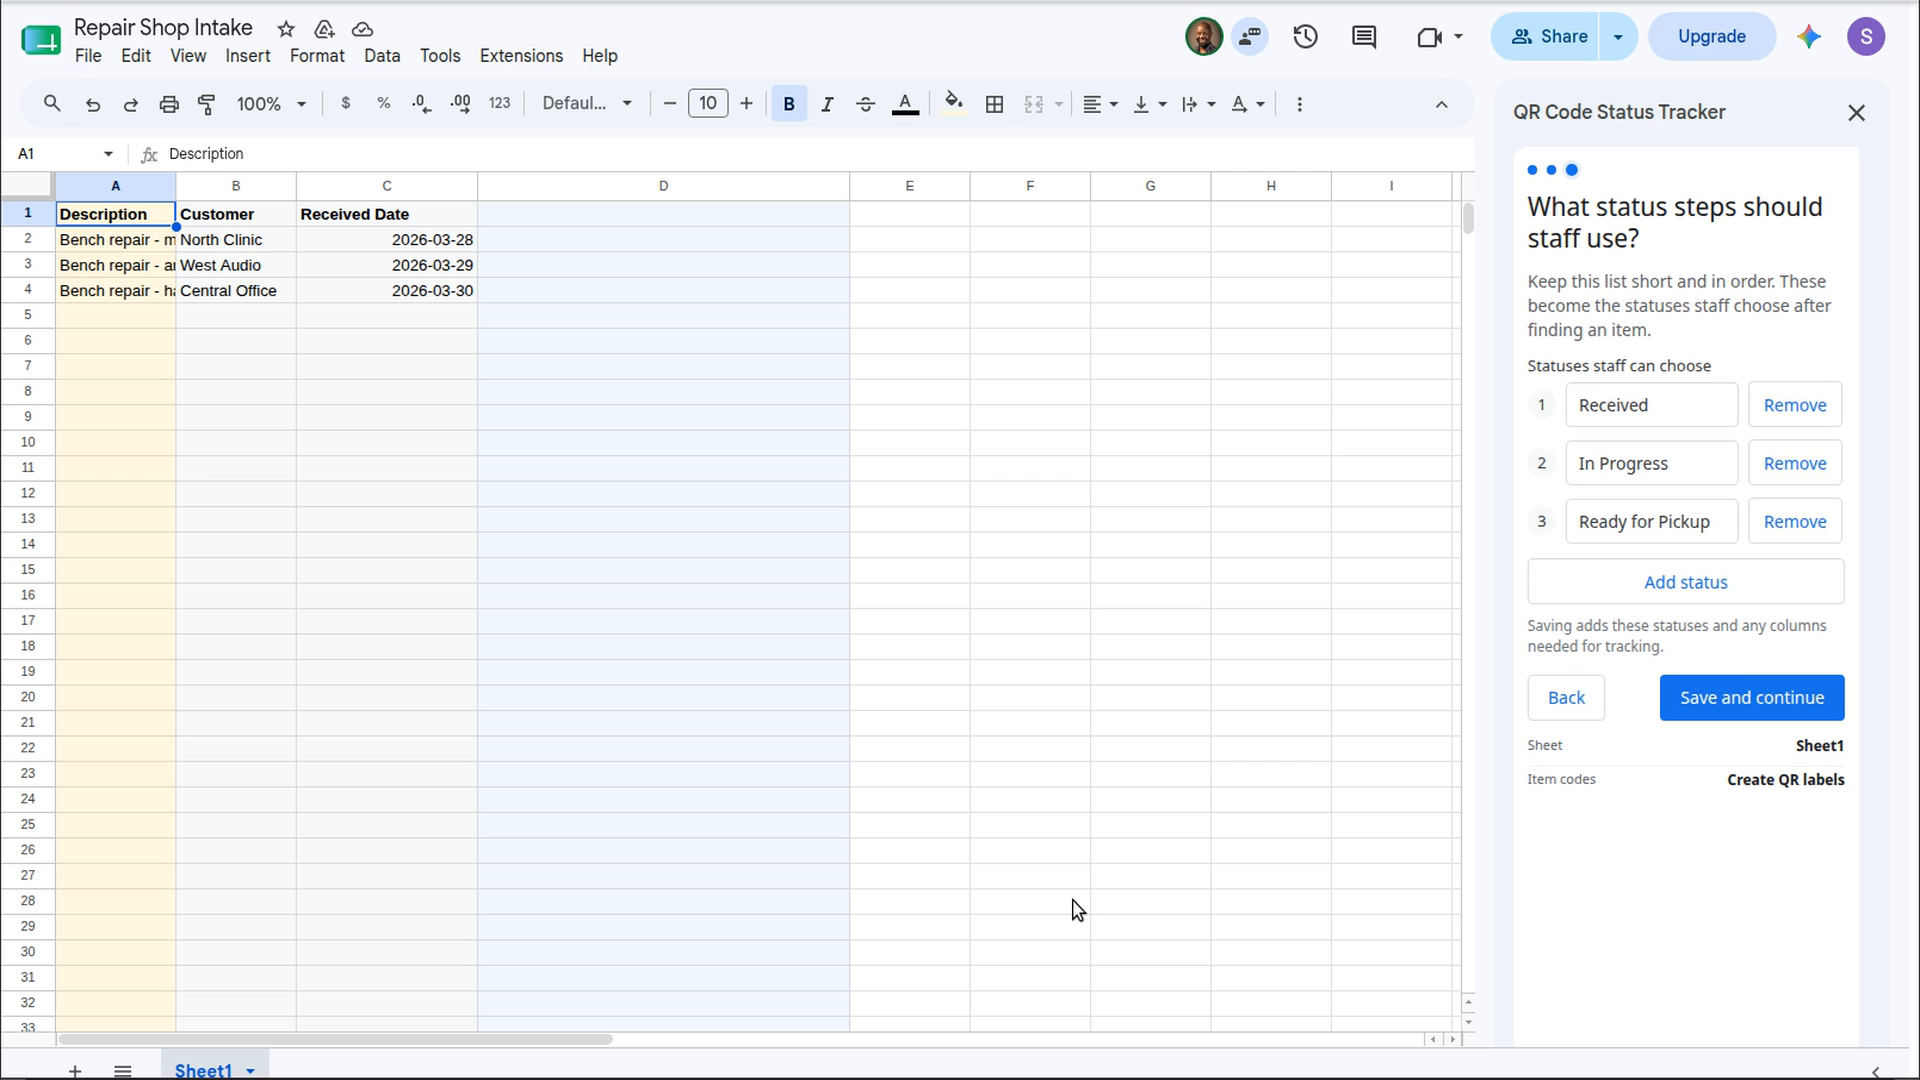
Choose how staff identify items
Use labels you already have
If items already have repair tags, job codes, serial numbers, barcodes, or QR codes, select the sheet column containing those values. Staff can scan or type the value to find the matching row.
Create tracking codes and QR labels
If the items do not have suitable labels, choose the generated QR option. The add-on adds one managed [Tracking Code] column and fills blank codes when you choose Create QR labels. Your existing columns and formulas remain yours.
The generated PDF contains printable labels for the selected item rows. Keep the tracking code with the item so staff and customers can scan the correct record.
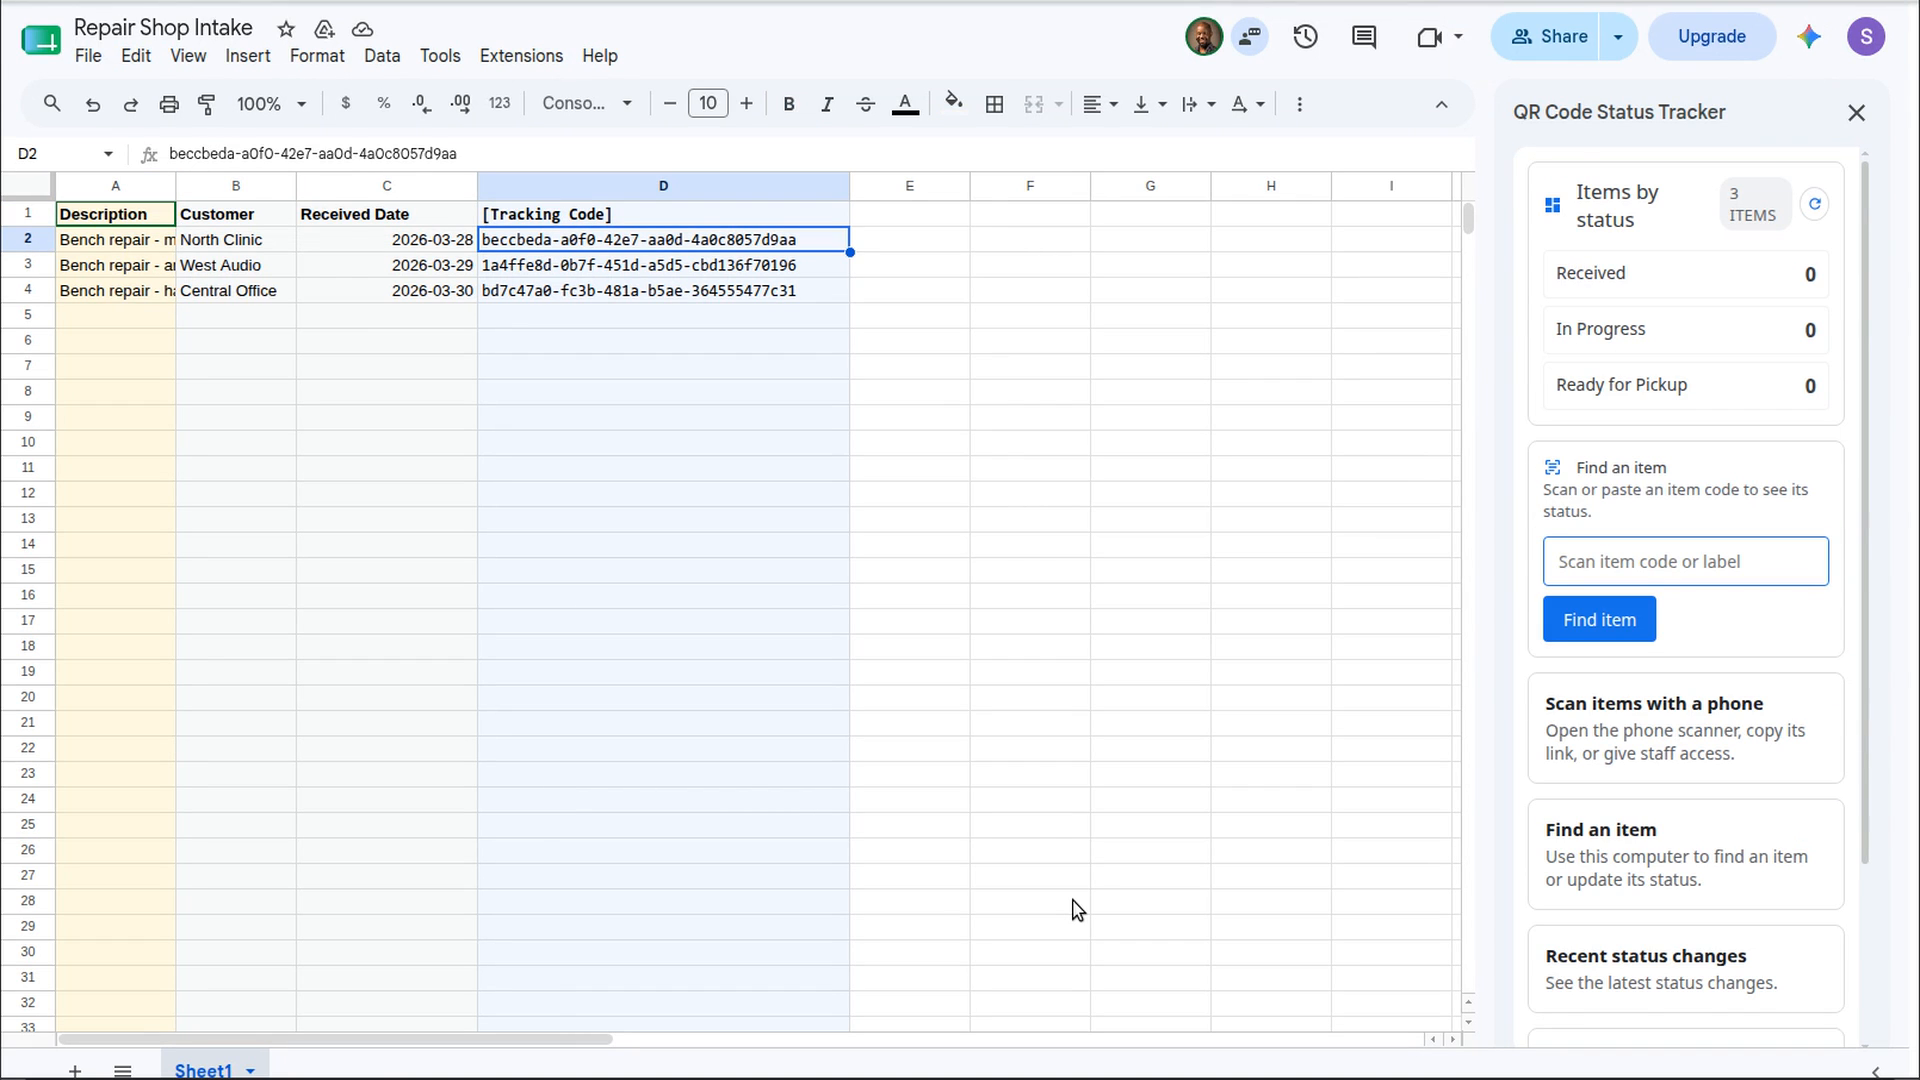
Move an item from Google Sheets™
- Open Find an item in the sidebar.
- Scan or type the item code, or select the matching sheet row.
- Review the current status and previous activity.
- Choose the next status. You can add a short note when useful.
- Confirm the move.
After a move, the item view shows the new status and history. A short undo action is available for accidental moves.
Move an item with a phone
- From the add-on home screen, open Scan items with a phone.
- Open or copy the scanner link. You can also give another staff member access using their email address.
- On the phone, scan the item’s QR code or use manual search.
- Review the item, then choose its next configured status.
- The scanner confirms the new status immediately.
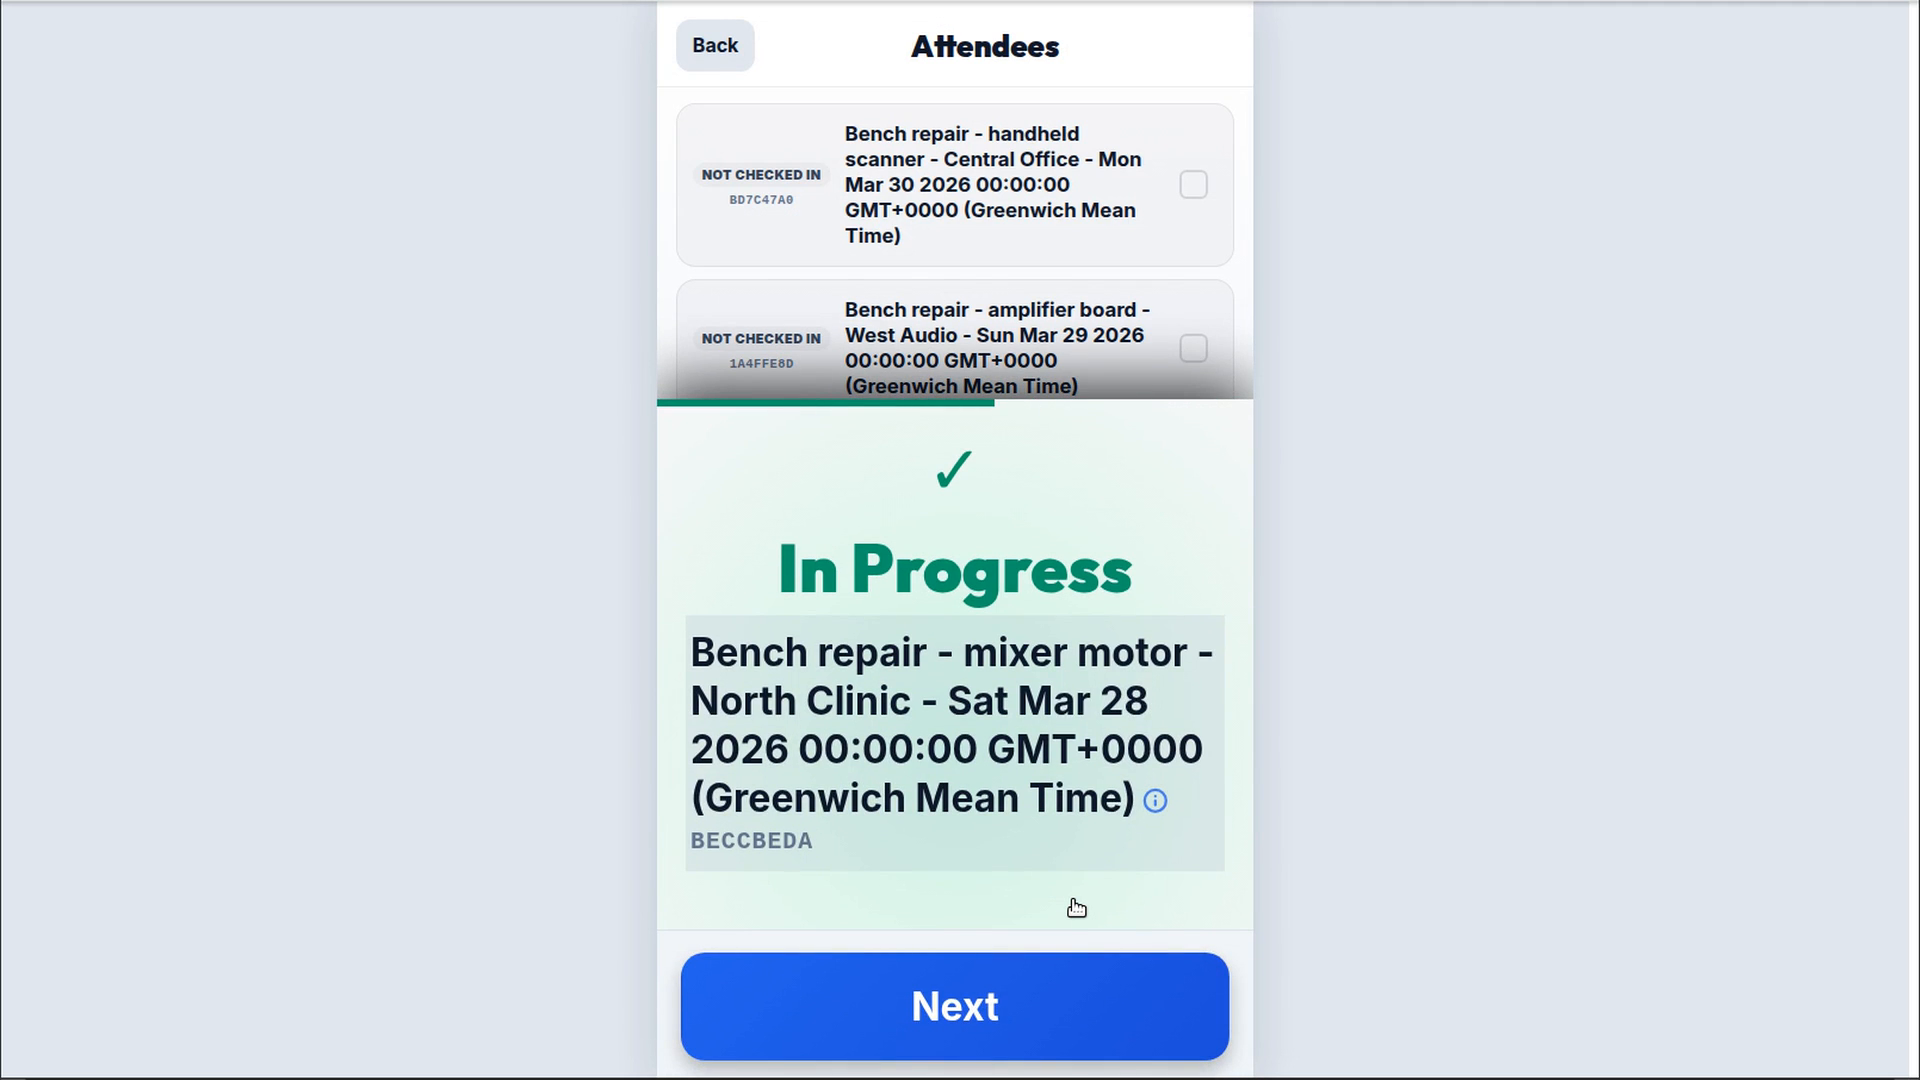
Review current status and history
Return to Google Sheets™ and refresh the add-on after a phone scan. The dashboard summarizes item counts by status. Finding the item shows its exact current status, activity history, operator information when available, and any notes recorded with moves.
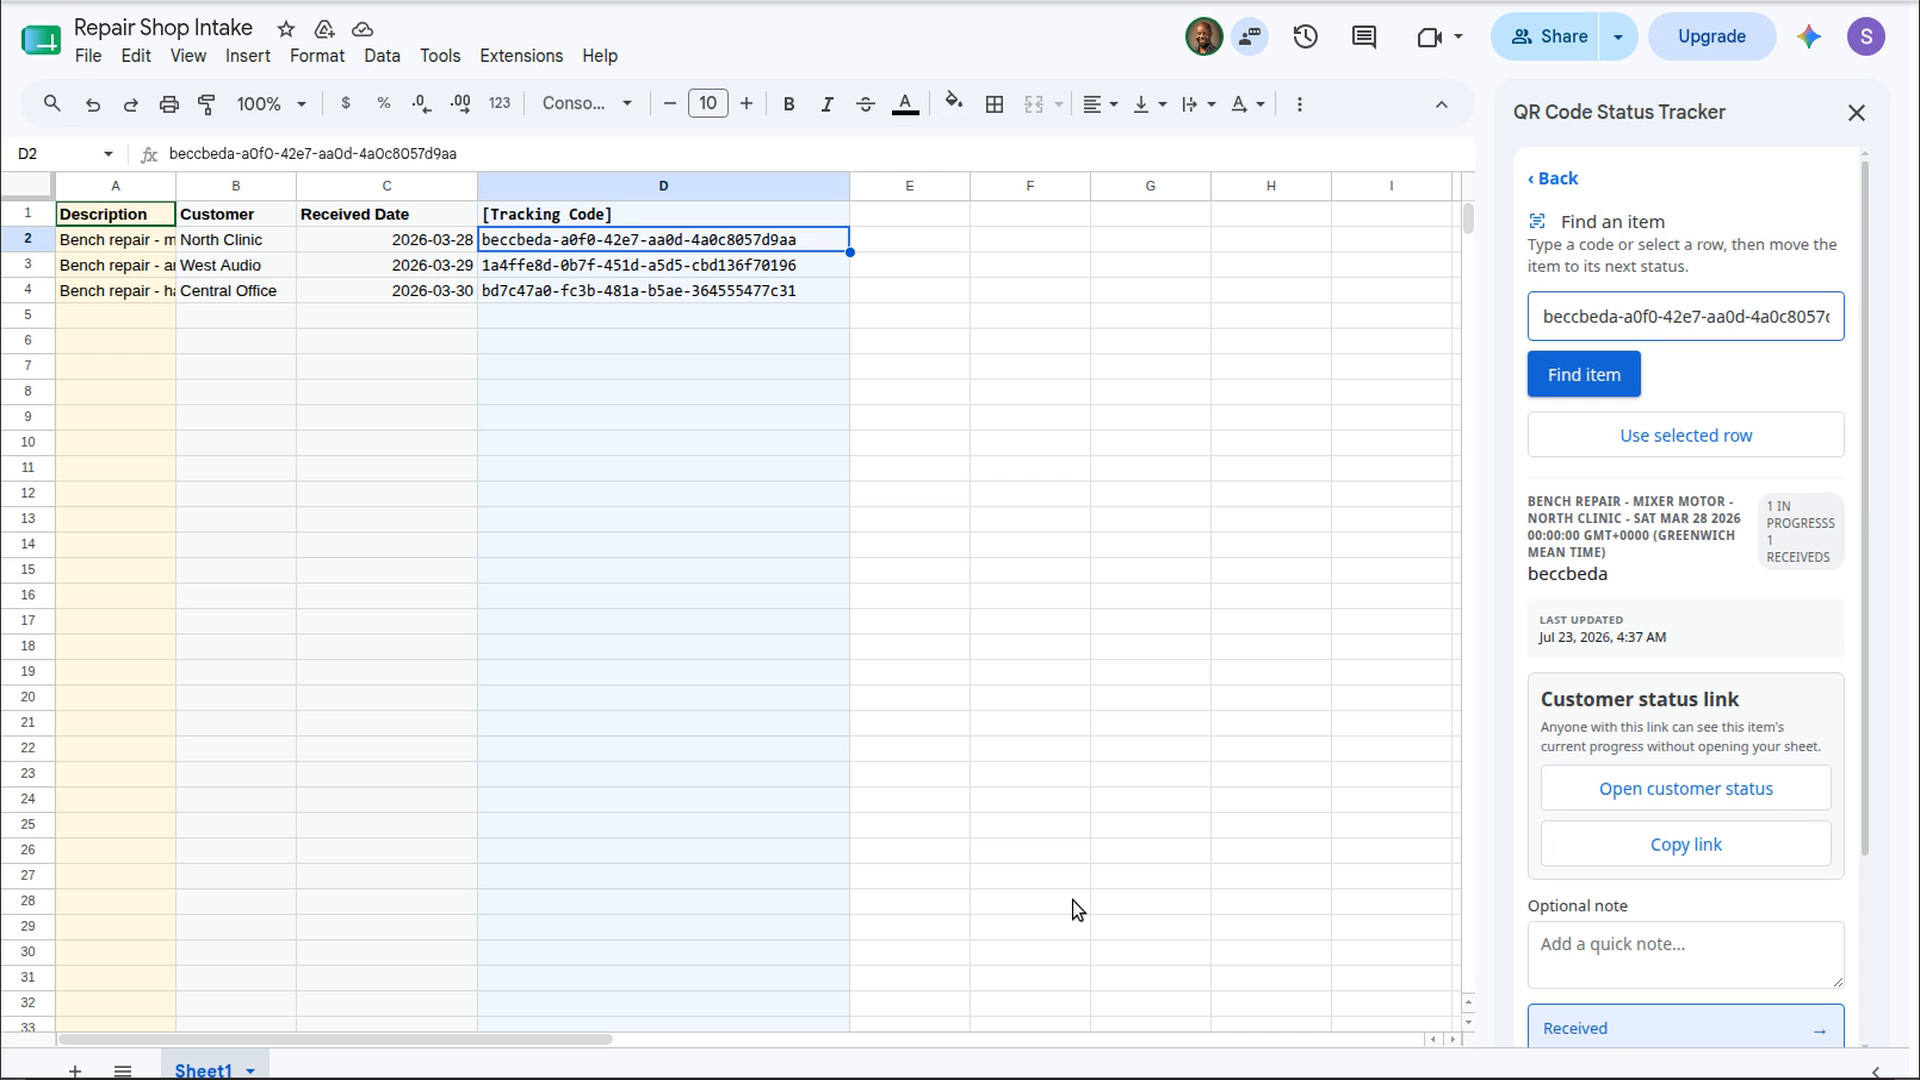
Share progress with customers
Customer status links are available only when Let customers see progress is enabled in setup.
- Find the item in the add-on.
- Choose Open customer status to check the page yourself, or Copy link to share it.
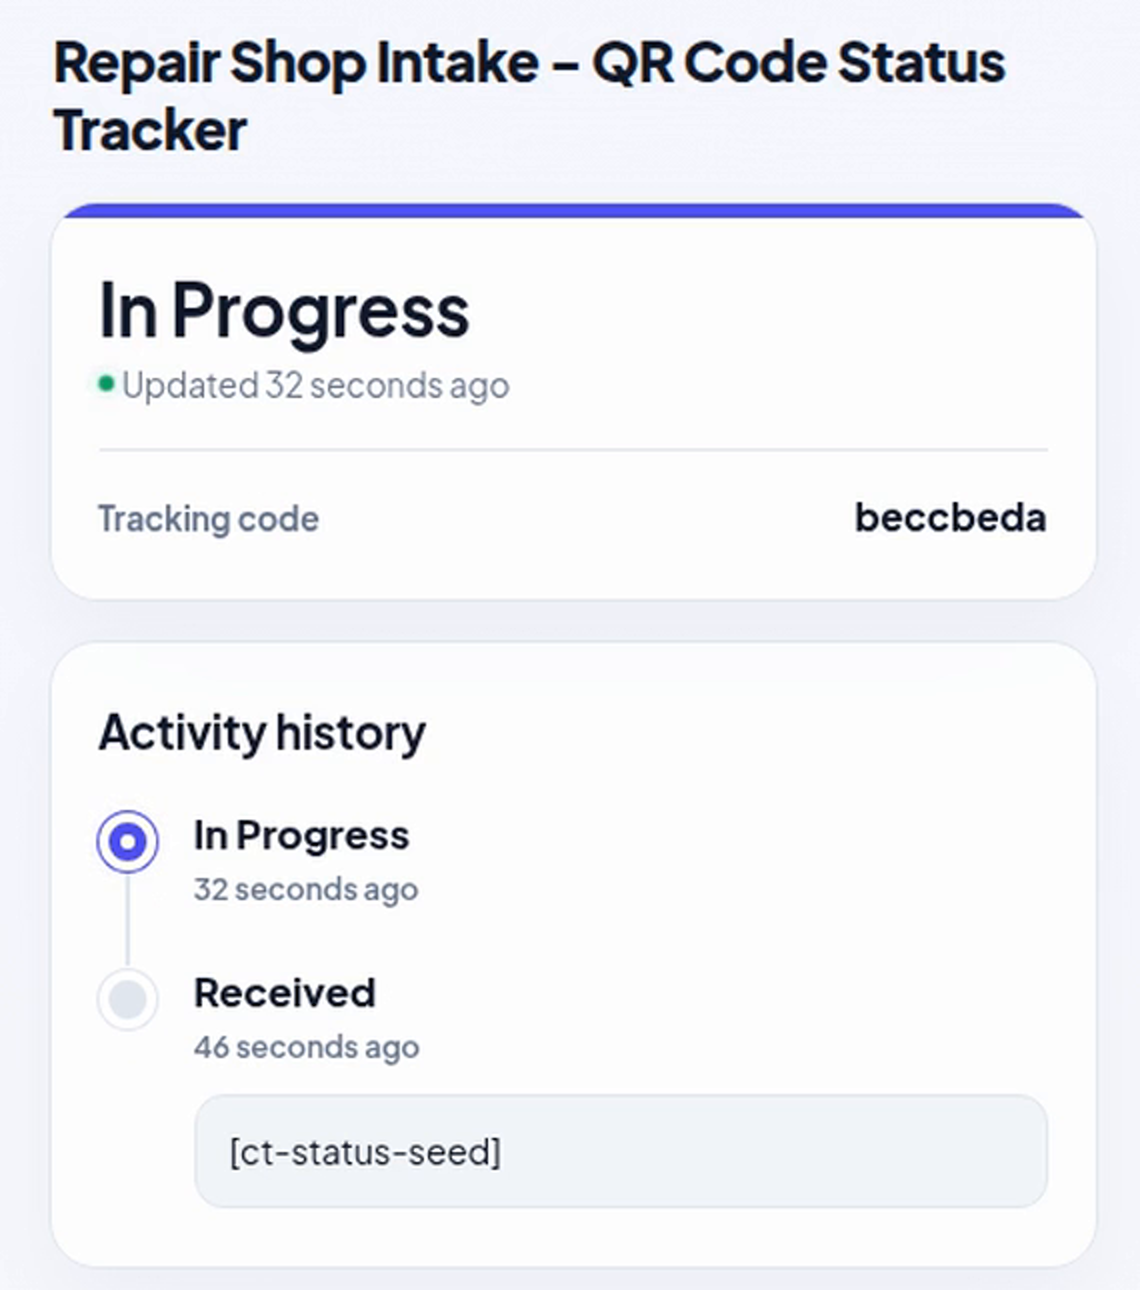
- The customer opens the link to see the current status and activity history.
Customers do not need a Google account and cannot access the spreadsheet. The status page uses a long, unguessable item URL and is not listed publicly. Anyone you share the link with can view the item information published on that page.
Change setup later
Open Setup from the add-on home screen to change the tracked sheet, item-code choice, status steps, or customer updates. Existing item columns are not rewritten by normal tracking operations.
If the managed [Tracking Code] column was removed, reopen the add-on, review setup, and save it again. Existing tracking codes should remain stable once assigned because printed labels and shared links depend on them.
Troubleshooting
- The sheet is not ready: make sure row 1 contains column titles, then choose Reload sheet info. You can use Add example rows to see the expected shape.
- No QR labels are created: add at least one item row, then open QR labels and examples and choose Create QR labels.
- A scan cannot find an item: confirm that the scanned value matches the selected existing-code column or the item’s generated tracking code.
- The phone scanner shows old data: refresh the scanner page, then scan the item again.
- The customer page cannot find the item: confirm customer progress sharing is enabled and that the item has already been assigned a tracking code.
- Setup is incomplete: reopen Setup, answer each question, and save again.
Why Google permissions are requested
- Display a sidebar in Google Sheets™: the add-on uses the Sheets editor sidebar for setup, item lookup, status changes, history, and sharing controls.
- Read and update the current spreadsheet: the add-on reads the selected sheet’s headers and item rows. When generated labels are selected, it adds and fills the managed [Tracking Code] column in that spreadsheet only.
- Read your Google Account email address: the email identifies the owner of the tracking setup and attributes operator activity.
- Connect to an external service: the add-on sends the workflow and item information needed by api.trak.codes to create tracking cases, store status history, generate QR labels, support the phone scanner, and provide optional customer status pages.
For the complete description of data use, storage, sharing, and deletion choices, read the QR Code Status Tracker Privacy Policy.
Product boundaries
- The add-on tracks item status. It does not manage inventory quantities, borrowers, or stockroom calculations.
- It does not use AI or machine learning models and does not send Google Workspace™ data to AI providers.
- Tracking cases, status history, and item data needed for the workflow are stored by the Darkaa Trak service.
Privacy, terms, and support
Read the QR Code Status Tracker Privacy Policy for details about Google user data, spreadsheet data, Trak storage, customer pages, and deletion requests.
Use of the add-on is governed by the QR Code Status Tracker Terms of Service.
For help, please fill the support form. Include the add-on name, the step where you got stuck, and a screenshot that does not contain sensitive item information.
Google Sheets™ and Google Workspace™ are trademarks of Google LLC.